Part 1 left us with a large cryptic looking string (a recursively applied grammar applied to an axiom, for the purists).
In part 2 we’ll go from that big string to a visual representation, by making use of that string as a set of commands for a turtle language.
Turtle graphics came to fame in the days of Darwin’s voyage to the Galapagos the Logo programming language, and in many ways are the grand-daddy of vector graphics languages like SVG.
For more details, read the turtle graphics article in wikipedia, it’s (at the moment) short and to the point.
Turtle Graphics Language
In our case, the language is made up of the following basic commands:
- F : go forward one step
- + : turn left by a fixed angle
- – : turn right by a fixed angle
- [ : push current turtle state in the stack
- ] : pop current turtle state in the stack
Those five commands allow to render any monochrome connected graphics. Of course the language can be extended to allow more operations: changing color, changing pen width, moving without drawing, specifying filled polygons, extending to 3 dimensions, etc.
Show me the code!
Implementing an interpreter for the above language is a smple affair. First, we define a structure to hold the current state of the turtle:
type
   TLSystemRendererState = record
      X, Y : Float;
      A : Float;
   end;
and the minimal renderer object with current state and stack would be
type
   TLSystemRenderer = class
      private
         FState : TLSystemRendererState;
         FStack : array of TLSystemRendererState;
      public
         procedure Render(canvas : TW3Canvas; const axiom : String);
   end;
The Render method is where everything happens:
procedure TLSystemRenderer.Render(canvas : TW3Canvas; const axiom : String);
var
   i : Integer;
   a : Float;
begin
   canvas.BeginPath;
   canvas.MoveToF(FState.X, FState.Y);

   for i := Low(axiom) to High(axiom) do begin
      case axiom[i] of
         'F' : begin
            FState.X += Cos(FState.A)*Size;
            FState.Y -= Sin(FState.A)*Size;
            canvas.LineToF(FState.X, FState.Y);
         end;
         '+' : FState.A += Angle;
         '-' : FState.A -= Angle;
         '[' : FStack.Push(FState);
         ']' : begin
            FState := FStack.Pop;
            canvas.MoveToF(FState.X, FState.Y);
         end;
      end;
   end;

   canvas.Stroke;
end;
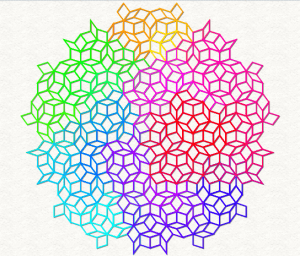
Characters that are not commands are just ignored, this is quite important for L-System, as non-command characters are often used at the grammar level for the rule (the Penrose tiling being a good example).
The renderer leverages the stack-like pseudo methods of dynamic arrays along with the automatic record cloning, so the code is rather simple as you can see.
Not explicited above are the Angle is the angle parameter (in radians), which you’ll want to make a property of the renderer. Also Size is the standard step Size, for LSystemFiddle, 10 seems to look good for a line width of 1, but you may want to allow fiddling with it in a more complete renderer.
That’s all for the monochrome renderer, but that’s not all for this series 😉
If you check again the Live Demo App, you’ll see a new “Publish” button was added since part 1 was… published (hit F5 if you don’t).
Feel free to use the new “Publish” button to share your creations!


Oh, good old turbo pascal( ver 3 to 5.5) had turtle graphics. 4 pens and 16 colours. See http://edn.embarcadero.com/article/20792, and there was a book by James L. Slack, http://www.amazon.com/Turbo-Pascal-turtle-graphics-James/dp/0314674373.